
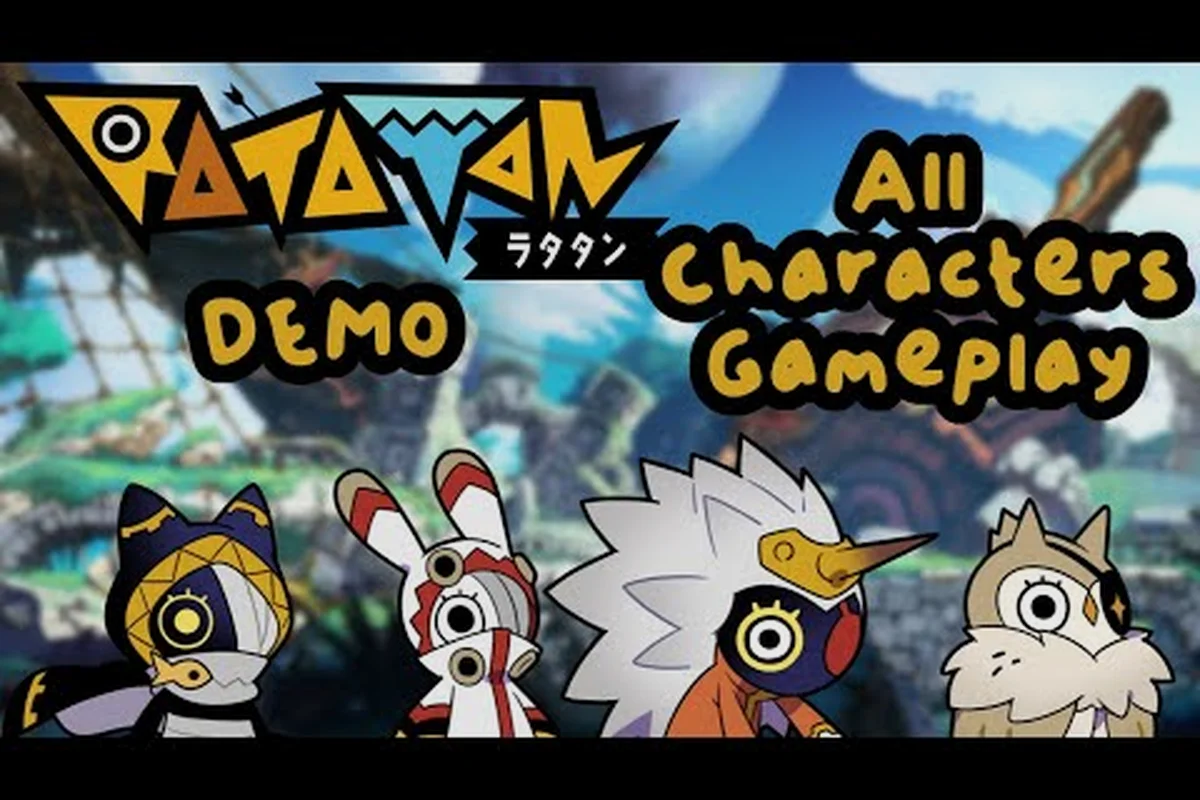
Welcome to the Ratatan character gallery, a visual tour of every hero and helper that lines up behind your drum-stick conductor. The 1.0 release on October 14, 2026 brought the roster together under one cohesive art direction, so this gallery is the right place to start if you want to see what each character actually looks like in motion, and which of them deserves a slot in your first formation.
Roster at a Glance: The Ratatan Character Gallery
The full Ratatan characters roster spans four visual archetypes that the developer groups by silhouette and combat role. Players who browse the Ratatan Steam Community hub often use screenshots to compare these silhouettes side by side, because the game relies heavily on shape recognition during a Fever Mode push where the screen fills with Cobun stacks. The four archetypes are:
-
Drum Heroes — the four main conductors who carry the rhythm and dictate formation movement.
-
Cobun Warriors — front-line melee followers that swing, thrust, and tank hits.
-
Cobun Archers — ranged followers that fire volleys and trigger on-rhythm bonuses.
-
Cobun Casters — support and magic followers that apply buffs, debuffs, and healing pulses.
| Archetype | Count in Roster | Combat Role | Where They Appear |
|---|---|---|---|
| Drum Heroes | 4 | Conduct rhythm, lead formation | Always present |
| Cobun Warriors | 11 | Front-line damage and tanking | Queue behind hero |
| Cobun Archers | 8 | Ranged volleys and sniping | Queue mid-formation |
| Cobun Casters | 6 | Buffs, debuffs, healing | Queue at back |
Browsing the Ratatan Steam Community screenshots page is the fastest way to see how dense a formation can become, especially during late-Episode fights where all four queue rows are filled simultaneously. Player-submitted captures show that a fully stacked roster will often cover the lower third of the screen with characters, which is why silhouette readability matters more than fine detail.
Why the Gallery Matters for New Players
First-time players often pick a hero based on a single screenshot, but each Ratatan character has layered design notes that explain the intended playstyle. A gallery view helps you match your rhythm preference to the right hero, instead of locking in during the opening tutorial and regretting it once Episode 3 introduces tighter timing windows. The character select screen offers only a name and a portrait, so this gallery fills in the missing context.
Keroronpa: The Pink-Haired Hero of the Opening
Keroronpa is the first Drum Hero most players see, and the Ratatan Development Diary on Steam confirms that the character was designed as a balance anchor for new players. The pink twin-tail silhouette reads clearly even when the screen is crowded with followers, which is intentional, because the developer wanted the conductor figure to stay visible during Fever Mode flash effects. Keroronpa's design notes emphasize three things: approachable timing windows, forgiving formation spacing, and a visual identity that does not get lost behind Cobun stacks.
Keroronpa Guide: Strengths and Timing
A practical keroronpa guide starts with rhythm accuracy. Keroronpa rewards a steady 4/4 beat, because her passive, Maiden Tempo, grants a small damage bonus when the player hits the drum within a 60 ms window of the prior hit. The bonus caps at 12% after eight consecutive clean beats, which is enough to make early Episode 2 fights noticeably easier without trivializing them. Players who struggle with rapid double-tap beats should pick Keroronpa first, because she is the most forgiving of the four Drum Heroes.
| Stat | Keroronpa Value | Notes |
|---|---|---|
| Beat Window | ±60 ms | Most forgiving of the four heroes |
| Passive Cap | +12% damage | Reached after 8 clean beats |
| Formation Speed | 1.0x | Baseline movement speed |
| Fever Charge | Fast | +15% charge rate vs. average |
Keroronpa Build: Recommended Early Picks
A solid keroronpa build for the first two Episodes leans on passive Cobun choices that extend the timing window rather than spike damage. Pair her with two Slowpokes in the front row, which add 10 ms of leeway to every beat when they are in the formation, and one Mimizukyun in the back row for a small healing pulse on Fever activation. For a deeper dive on Mimizukyun setups, the dedicated Mimizukyun build overview walks through which Cobun types amplify the healing pulse and which overwrite it.
Harigittan: The Green-Haired Precision Hero
Harigittan is the second-most-popular Drum Hero in the current player base, according to community discussion, and her green long-hair silhouette is one of the cleanest in the entire game. A harigittan guide usually begins with her defining trait: she is the highest damage ceiling among the four heroes, but the trade-off is a tighter beat window. Players who enjoy rhythm games with strict timing will click with Harigittan almost immediately, while players coming from action-RPG backgrounds often need a few hours to internalize her rhythm.
Harigittan Guide: Beat Discipline and Burst
The harigittan guide breakdown is centered on her passive, Sniper Pulse, which converts clean beat accuracy into bonus critical rate. The bonus starts at +4% and climbs to +20% as the player holds a perfect beat streak, but the streak resets on any beat that falls outside the ±35 ms window. That makes Harigittan a high-variance hero: when the player is locked in, she outputs more damage than Keroronpa; when the player is off, she outputs noticeably less. The community refers to this as the "all or nothing" playstyle.
| Stat | Harigittan Value | Notes |
|---|---|---|
| Beat Window | ±35 ms | Tightest of the four heroes |
| Passive Cap | +20% crit rate | Resets on missed window |
| Formation Speed | 1.1x | Slightly faster than baseline |
| Fever Charge | Average | Standard charge rate |
Harigittan Build: Supporting the Streak
A harigittan build that supports the streak usually front-loads two Nyandola units, because Nyandola grants a +5% crit chance passive when both are present in the formation, which stacks with Harigittan's own cap to push effective crit rate well above 30% during a clean run. The full list of Nyandola breakpoints and stacking rules lives in the Harigittan build deep dive, which is worth bookmarking if you plan to run Harigittan through Episode 4 and beyond.
The Remaining Drum Heroes: Nyandola and Mimizukyun
Two of the four Drum Heroes double as Cobun names, which is a common source of confusion for new players. Nyandola and Mimizukyun each appear twice in the gallery: once as a hero portrait on the character select screen, and once as a Cobun follower you can queue behind the hero. The hero version is the one with the larger health bar and the conductor pose, while the follower version is smaller and uses the same silhouette but with a different idle animation.
| Hero | Archetype Match | Visual Cue | Distinguishing Idle |
|---|---|---|---|
| Keroronpa | None — hero only | Pink twin-tails | Conducting baton twirl |
| Harigittan | None — hero only | Green long hair | Calm one-foot tap |
| Nyandola | Yes — cat-eared Cobun | Cat ears + tail | Tail flick on each beat |
| Mimizukyun | Yes — bird-masked Cobun | Oni-style mask | Mask wobble on Fever |
Why Dual-Identity Heroes Matter
The dual-identity design choice means that building a Nyandola formation is different from playing as the Nyandola hero. When you play as the hero, you get her tempo passive; when you queue her as a follower, you get only the Cobun passive. Players who want a full Nyandola synergy should run the Nyandola hero and queue two Nyandola Cobun behind her, which triggers both passives at once. This same rule applies to Mimizukyun, and is one of the deeper mechanics that experienced players use to push late-game damage gates.
Cobun Design Notes: What Each Follower Brings
Beyond the four Drum Heroes, the gallery includes 25 unique Cobun followers split across the three combat archetypes. The gallery view is the easiest way to see which Cobun is which, because many of them share color palettes and the only reliable identifier is silhouette. The developer intentionally designed the Cobun roster so that a player who can recognize 6-8 silhouettes can identify any formation in motion.
Cobun Warrior Lineup
The warrior line is the longest and most varied. Each warrior has a different weapon silhouette, which doubles as a quick-read cue during Fever Mode. A hammer-wielder will obviously be slower than a dagger-wielder, and the gallery makes that trade-off visible at a glance.
| Cobun | Weapon | Role | Best Paired Hero |
|---|---|---|---|
| Slowpoke | Hammer | Tank, beat-window extender | Keroronpa |
| Spikey | Spear | Mid-line damage | Harigittan |
| Boombo | Bomb | AoE burst | Any |
| Kabotchi | Club | Crowd control | Keroronpa |
| Tongor | Trident | Anti-air | Harigittan |
| Nokkun | Sword | Balanced | Any |
| Guragura | Mace | Stun focus | Mimizukyun |
| Zuzutto | Dagger | Fast strikes | Harigittan |
| Moguran | Pickaxe | Mining bonus | Any |
| Pukurin | Halberd | Reach | Nyandola |
| Daradara | Flail | Slow swing, high damage | Keroronpa |
Cobun Archer and Caster Lineups
Archers and casters are smaller in count, but they cover more mechanical ground. Archers specialize in single-target damage and trigger on-rhythm volley bonuses, while casters apply buffs, debuffs, and healing. A balanced formation typically runs two warriors, one archer, and one caster behind the hero, though competitive runs often go full-archer for raw damage during boss fights.
| Cobun | Type | Signature Effect | Synergy |
|---|---|---|---|
| Pippin | Archer | Volley on 8th beat | Harigittan |
| Churu | Archer | Pierce through line | Any |
| Yoyo | Archer | Curve shot | Nyandola |
| Pockle | Archer | Triple tap | Keroronpa |
| Nokona | Archer | Long range | Harigittan |
| Kamega | Archer | Shell-shield on hit | Keroronpa |
| Pichipichi | Archer | High crit | Harigittan |
| Meromero | Archer | Charm on hit | Nyandola |
| Maboroshi | Caster | Damage buff aura | Any |
| Kukuri | Caster | Heal on Fever | Mimizukyun |
| Poryon | Caster | Slow debuff | Keroronpa |
| Fushigi | Caster | MP regen pulse | Any |
| Kirakira | Caster | Crit damage buff | Harigittan |
| Mokomoko | Caster | Shield on clean beat | Keroronpa |
Players who want a fuller breakdown of how these Cobun types interact, including which combinations trigger hidden set bonuses, can cross-reference the broader Ratatan characters list for unlock conditions and stat scaling per Cobun.
Putting the Gallery to Work: Picking Your First Team
The gallery is not just a visual reference; it is also a decision tool. The fastest way to pick a starter team is to choose a hero based on rhythm preference, then fill the four Cobun slots with silhouettes that complement the hero's passive. A Keroronpa player benefits from beat-window extenders, a Harigittan player benefits from crit-rate boosters, a Nyandola player benefits from cat-stack synergies, and a Mimizukyun player benefits from healing-pulse amplifiers.
Decision Matrix by Player Type
| Player Type | Recommended Hero | Recommended Cobun Loadout | Why |
|---|---|---|---|
| New to rhythm games | Keroronpa | 2 Slowpokes, 1 Pockle, 1 Mokomoko | Forgiving timing, supportive Cobun |
| Experienced rhythm players | Harigittan | 2 Nyandola, 1 Pippin, 1 Kirakira | High crit ceiling, sharp timing |
| Defensive players | Mimizukyun | 2 Kukuri, 1 Guragura, 1 Boombo | Healing pulse plus stun |
| Speedrunners | Nyandola | 2 Nyandola, 1 Yoyo, 1 Meromero | Crit and charm stacking |
This decision matrix is a starting point, not a rule, and the community has published a wide range of alternative builds on the Steam Community hub. The Ratatan tier list is a useful complement once you have run the first Episode, because it ranks each hero against the late-game damage gates that new players will eventually face.
Frequently Asked Questions
Where can I see every Ratatan character in one place?
The Steam Community screenshots page on the official Ratatan hub is the largest player-run gallery, with hundreds of captures that show each hero and Cobun in motion. The in-game gallery is smaller but higher quality, and the official site refreshes it with each major patch.
Is Keroronpa a good pick for the full campaign?
Yes, Keroronpa remains viable through the post-game because her passive, Maiden Tempo, scales linearly with clean beats and never falls off. She will not top the leaderboards, but she clears every damage gate without requiring a full formation respec between episodes.
How is Harigittan different from Keroronpa in practice?
Harigittan trades Keroronpa's generous timing window for a higher damage ceiling, and her passive, Sniper Pulse, converts clean beats into critical rate up to +20%. Players who can hold a steady rhythm outperform Keroronpa players; players who cannot will feel the gap immediately after the first Fever Mode.
Can I unlock every Cobun in the gallery?
Yes, all 25 Cobun are unlockable through standard play, though some require specific Episode completions or post-game challenges. The full unlock tree is mapped in the Ratatan characters list with per-Cobun conditions and recommended farming routes.
Does the gallery change after the 1.0 release?
The 1.0 release on October 14, 2026 locked the roster, so no new characters were added at launch. The developer has hinted at a Season 1 update that will add a fifth Drum Hero, but as of the current patch the gallery covers exactly four heroes and 25 Cobun across the three follower types.