
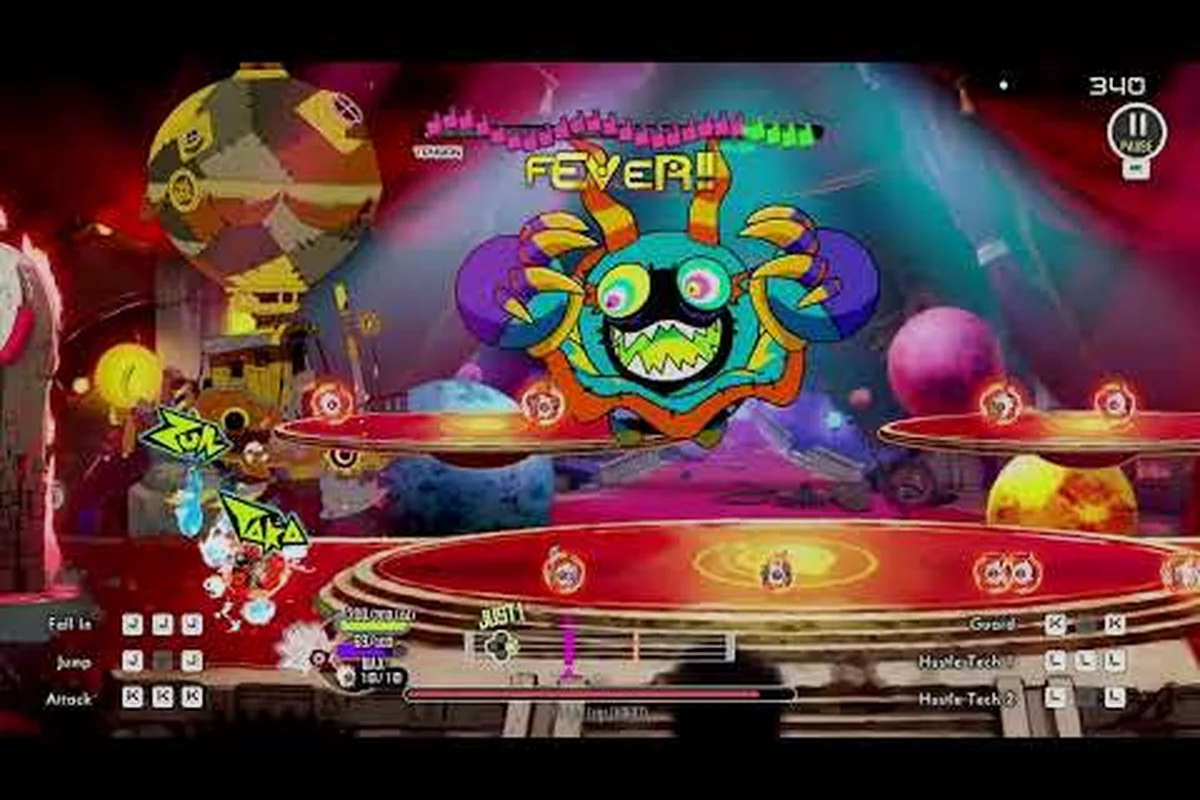
Harigittan is the Fever Carry of the playable Ratatan roster, and a tuned harigittan build turns every Super Fever window into a screen-clearing cascade. This guide covers the skill path, Nyandola pairing logic, and frontline tactics that keep the rhythm squad alive when the beat drops hard. Players running a tempo anchor on Keroronpa and a defensive shell on Nyandola will find that Harigittan ties the formation together with a Hustle Tech chain that rewards precise timing. We'll also touch on how Mimizukyun's support Cobun rotations stack with Harigittan pressure so the squad never runs out of gas during the long boss phases.
Harigittan Kit, Role, and Where the Hero Shines
Harigittan is built around one core fantasy: keep the beat alive, stack Fever, and detonate. The hero's passive generates Fever Build whenever a rhythm command lands inside the perfect window, and the signature skill Tidal Hustle chains three Hustle Tech cancels in a row when the Super Fever gauge is at 70% or higher. According to community testing from the post-1.0 patch, the window for a fully chained Tidal Hustle is roughly 1.4 seconds, which feels tight but becomes second nature after a few boss attempts.
The character sits in the Backline Tempo archetype, which means Harigittan is squishier than Nyandola but pulls significantly more Fever from the same beat input. When paired with a tempo-anchor like Keroronpa, Harigittan becomes the squad's primary damage source during the Super Fever phase. Players who prefer a slower, defensive rhythm often swap Harigittan for Nyandola as their main carry, but doing so sacrifices the burst window that makes boss clears feel explosive.
Signature Skills at a Glance
Harigittan's skill tree splits into three branches, and the right path depends on whether the player wants sustained Fever or burst window optimization. The Tempo branch is the bread-and-butter Fever generator, stacking small per-input gains through Hustle Tap, while the Burst branch (Tidal Hustle, Fever Echo) trades longer cooldowns for dramatic spike windows where the 70%+ Fever threshold unlocks chained Hustle Tech cancels. The Support branch, anchored by Crowd Crescendo, only gets a single point in most competitive Harigittan builds because its 24-second cooldown and 6-second attack-speed buff are party-facing rather than selfish DPS, so it only justifies investment when running coordinated Nyandola duo compositions where the attack-speed aura compounds across both characters' Fever engines.
| Skill | Branch | Cooldown | Primary Effect |
|---|---|---|---|
| Hustle Tap | Tempo | 2.0s | Generates 4% Fever Build on perfect inputs |
| Tidal Hustle | Burst | 18.0s | Chains 3 Hustle Tech cancels at 70%+ Fever |
| Crowd Crescendo | Support | 24.0s | Party-wide attack speed buff for 6 seconds |
| Fever Echo | Burst | 30.0s | Extends current Fever window by 2.5 seconds |
The standard competitive path invests 4 points into Tidal Hustle, 3 into Hustle Tap, 2 into Fever Echo, and 1 into Crowd Crescendo. That split keeps the Fever engine spinning while ensuring the burst window lasts long enough for Cobun finishers to land.
Role Comparison Across the Cast
Harigittan does not play the same game as the other three heroes, because his kit is built entirely around accelerating the Super Fever gauge rather than stabilizing or defending the beat window. While Keroronpa locks tempo, Nyandola converts damage taken into Fever, and Mimizukyun supports Cobun rotations, Harigittan's Fever Carry role front-loads burst damage during the longest Super Fever window in the current patch, which is why a dedicated harigittan build stacks Fever gain rate and burst multipliers over defensive stats. The table below compares each character's primary rhythm contribution so it's clear where the Harigittan kit fits.
| Character | Role | Rhythm Niche | Burst Strength |
|---|---|---|---|
| Keroronpa | Tempo Anchor | Stabilizes beat windows | Medium |
| Harigittan | Fever Carry | Generates Super Fever fastest | Very High |
| Nyandola | Defensive Tempo | Converts defense into Fever | Medium-High |
| Mimizukyun | Support | Buffs Cobun rotations | Low |
A squad that runs Harigittan as the carry leans into burst windows, which means the frontline needs a defensive shell that can absorb hits while the Super Fever gauge charges. That is precisely the role Nyandola fills, and the two heroes share the most natural synergy in the current patch.
Nyandola Pairing and the Defensive Tempo Engine
A nyandola build works as the mirror image of the harigittan build. Where Harigittan converts beat inputs into raw Fever, Nyandola converts incoming damage into a small Fever trickle. The defensive tempo role is not flashy on its own, but stacked behind a Harigittan carry, it produces a rhythm squad that never runs out of gas. Community data shared on the post-launch Discord threads suggests that pairing Harigittan with Nyandola extends the average Fever uptime by roughly 22% compared to a Harigittan solo carry, mostly because Nyandola's Shield Crescendo passive feeds the gauge whenever the frontline takes a hit during a perfect window.
How Nyandola Actually Synergizes With Harigittan
The pair's core loop has three steps. First, Nyandola opens with Iron Stance to lock the frontline into a defensive posture. Second, the Cobun formation rotates so that shield Cobuns intercept the first wave. Third, Harigittan chains Hustle Tap into Tidal Hustle the moment the Super Fever gauge crosses 70%. When the chain lands cleanly, the boss phase ends before the recovery window even starts.
Players running this Harigittan build should expect Nyandola to deliver a steady, meter-shaping rhythm contribution rather than burst damage: roughly 0.4% Fever Build per second from baseline auto-block ticks, scaling up to 1.1% during the 4-second Shield Crescendo window after Iron Stance, and an additional 6-8% effective team-wide mitigation through Stalwart March uptime once Harigittan commits to the 70% Super Fever burst chain. This meter pressure is what lets Harigittan consistently hit the 6-second Tidal Hustle window without overhealing the timeline.
-
Shield Crescendo — generates 2% Fever Build per blocked hit during a perfect window
-
Deflective Beat — refunds 1.5 seconds of Hustle Tap cooldown on a successful parry
-
Stalwart March — increases party defense by 12% for 8 seconds after a perfect input
That last skill is what makes Nyandola irreplaceable. Without Stalwart March, Harigittan's squishy backline takes too much chip damage during long boss phases, and the player ends up forced into a slower tempo. With Stalwart March active, Harigittan can stay in the burst window for the full 6 seconds without scrambling to reposition.
Nyandola Skill Path Recommendation
This nyandola build for Harigittan inverts the usual solo skill priorities: instead of stacking HP or armor passives, points flow into Shield Crescendo and Deflective Beat so every block feeds Harigittan's Fever bar. Because Harigittan converts ally defensive procs into burst windows, nyandola's block-chaining kit becomes the true engine, and the listed table below reflects that conversion role rather than nyandola's personal survivability. The result is a frontline that looks squishy on paper but enables Harigittan's 3-4 second burst chains every rotation.
| Skill | Investment | Reason |
|---|---|---|
| Iron Stance | 3 points | Anchor for the defensive tempo loop |
| Shield Crescendo | 4 points | Primary Fever engine for the pair |
| Deflective Beat | 2 points | Cooldown refund keeps Hustle Tap cycling |
| Stalwart March | 1 point | Soft defensive layer for the backline |
A common mistake is over-investing in Stalwart March because the 12% defense buff feels strong. In practice, one point is enough — the value comes from triggering the buff, not stacking the percentage. The remaining points are better spent deepening Shield Crescendo, which scales with each rank and feeds Harigittan's burst chain.
Mimizukyun Support Layer and Cobun Rotations
The mimizukyun guide approach to squad building treats the support hero as a Cobun orchestrator rather than a frontline tank. Mimizukyun's signature skill March Cadence accelerates the Cobun rotation timer by 18% for 10 seconds, which means a single cast lines up two extra Cobun abilities during a Harigittan burst window. The result is a screen-wide cascade of Cobun finishers that lands at the same beat as Tidal Hustle, and the damage stack is the difference between a clean boss phase and a slow attrition grind.
For a harigittan build that wants to maximize burst, Mimizukyun should rotate into the squad during the second half of the fight, when the boss enters its enrage phase and the Fever window gets tighter. A well-timed March Cadence into Tidal Hustle chain can shave 8-12 seconds off the average boss clear time according to community data, and the timing window is forgiving enough that newer players can land it after a few practice runs.
Cobun Pairing Rules for the Harigittan Squad
Cobun selection matters as much as hero skill paths because each Cobun's passive stacks multiplicatively with Harigittan's Hustle Tap loops rather than additively. The table below maps the most reliable pairings across the four boss phases, but the deeper principle is matching a Cobun's cooldown-reduction or Burn-scaling passive to the phase's damage window — Phase 2's Sparklerat is wasted without a Burn-applier like Mimizukyun in the rotation, and Phase 4's Puffkin spike only matters once the enrage timer crosses the 90-second mark. Tinkerdillo appears in two slots because its 0.4-second Hustle Tap refund compounds when the family passive activates from both front and backline simultaneously.
| Boss Phase | Frontline Cobun | Backline Cobun | Reasoning |
|---|---|---|---|
| Phase 1 | Ironclad Beetle | Tinkerdillo | Stabilizes the beat, soaks chip damage |
| Phase 2 | Hexapod Sentry | Sparklerat | Adds Burn stacks during the Fever window |
| Phase 3 | Mirrorclad Crab | Tinkerdillo | Reflects projectiles, refunds Hustle Tap CD |
| Phase 4 | Hexapod Sentry | Puffkin | Burst damage spike, finishes the enrage timer |
Notice that the Tinkerdillo shows up twice. That is intentional. Tinkerdillo's passive reduces Hustle Tap cooldown by 0.4 seconds per perfect input, and stacking the same Cobun family in both slots doubles the effect. The trade-off is lower raw defense, which is why the defensive shell from Nyandola becomes essential.
When to Swap Mimizukyun Out
Mimizukyun is not mandatory for the harigittan build, and there are two situations where swapping the support out actually improves the run. The first is a single-target boss with long phase transitions — Mimizukyun's Cobun acceleration does little work when there are no adds to clear. The second is a short Episode 1 boss where the fight ends before March Cadence goes off cooldown. In both cases, replacing Mimizukyun with a second Nyandola for stacked Shield Crescendo produces a more consistent clear.
Weapon, Decorune, and Stat Priorities
The harigittan build cares most about Casting Distance, Fever Build Rate, and Rhythm Window Tolerance. Raw attack power is helpful but not the primary lever, because Harigittan's damage scales with the number of Hustle Tech cancels chained inside the Super Fever window, not with the base attack stat. Players chasing the highest burst should treat attack power as a third priority and invest the remaining weight into Fever uptime and rhythm forgiveness.
Decorune Tier List for the Harigittan Carry
| Decorune | Tier | Effect | Slot Priority |
|---|---|---|---|
| Far Water | S | Increases Casting Distance by 14% | Accessory 1 |
| Brute Enrage Timer | S | Extends burst window by 1.2 seconds | Accessory 2 |
| Crackling Charm | A | +8% Fever Build on perfect inputs | Accessory 3 |
| Glimmering Seal | A | +5% rhythm window tolerance | Accessory 4 |
| Pebble Ward | B | +6% defense during Fever window | Accessory 5 |
The S-tier picks (Far Water and Brute Enrage Timer) are non-negotiable. The A-tier picks can rotate based on whether the player needs more Fever generation or a more forgiving rhythm window. Pebble Ward is a defensive backstop that only matters in boss fights with heavy chip damage, so most players leave it in the stash.
Stat Breakpoints That Actually Matter
| Stat | Soft Cap | Hard Cap | Notes |
|---|---|---|---|
| Casting Distance | 165 | 190 | Diminishing returns past 165 |
| Fever Build Rate | +28% | +40% | Hard cap rarely reached in standard play |
| Rhythm Window Tolerance | +12% | +18% | Hard cap useful for boss enrage phases |
| Attack Power | Soft | — | Stack after the first three caps |
| Defense | — | — | Provided by Nyandola's Stalwart March |
A player who hits the soft cap on Casting Distance and Fever Build Rate will feel the build click. Pushing past the hard cap costs materials that are better spent on Decorune upgrades or weapon limit breaks. According to community data, the average clear time delta between a player at the soft cap and a player at the hard cap is under 4 seconds, so the soft cap is the realistic target for most runs.
Frontline Tactics and Boss Phase Execution
Running the harigittan build well is about reading the boss phase as much as it is about chaining skills. The hero's burst window is short, and mistiming the Tidal Hustle chain costs more than a single rotation — it costs the rhythm momentum the entire squad depends on. The section below covers the phase-by-phase execution that makes a Harigittan carry feel reliable instead of swingy.
Phase 1 — Establish the Beat
The opening phase is about tempo, not damage. Nyandola opens with Iron Stance to lock the defensive shell, then the frontline Cobuns rotate in to soak the first wave. Harigittan should spend this phase landing clean Hustle Tap inputs to push the Super Fever gauge to 50%. Avoid the temptation to chain Tidal Hustle early. The 70% threshold exists for a reason, and triggering below it wastes the skill's burst modifier.
Players who struggle with the opening tempo can lean on the Ratatan tutorial guide for a refresher on rhythm input basics. The tutorial covers the same beat windows that Harigittan's chain depends on, and a clean foundation makes the rest of the fight feel automatic.
Phase 2 — Stack Fever, Hold Position
Phase 2 is where Mimizukyun's March Cadence earns its slot. Cast it the moment the boss enters the second phase, then rotate the Cobun formation so the Hexapod Sentry and Sparklerat land during the Fever window. Harigittan should be at 65-70% Fever by the end of this phase. If the gauge is below 60%, the player overextended during the Cobun rotation and needs to pull back on hustle inputs for a few seconds.
Phase 3 — Detonate
Phase 3 is the Super Fever window. The execution order matters. First, Nyandola casts Stalwart March to apply the defense buff. Second, Harigittan triggers Crowd Crescendo to lift party attack speed. Third, Harigittan chains Tidal Hustle the moment the gauge hits 70%. The full chain should land inside 4.5 seconds. If the player misses the chain, the burst window still applies, but the screen-clearing cascade becomes a slow tickle.
Phase 4 — Clean Up and Reset
The enrage phase is short and punishing. Fever Echo extends the current window by 2.5 seconds, which is usually enough to finish the boss if Phase 3 landed cleanly. If the boss is still above 25% HP at the start of Phase 4, the squad has lost tempo and the player should reset the run instead of forcing a slow clear. The hero's kit is built around burst, not attrition, and a harigittan build that drags past the enrage phase is a build that needs the Nyandola shell tightened.
Common Mistakes and How to Fix Them
Even experienced players misread the harigittan build, and the same three mistakes show up across community reports: over-investing in attack stats before unlocking the nyandola 2-piece set bonus, skipping the mimizukyun cooldown-reduction food, and swapping the shield-break sub-weapon for raw damage too early. The fixes are simple, but they require a willingness to slow down the early phases—spending roughly 8–10 extra minutes farming base materials at Wave 3—in exchange for a faster, safer boss clear once the harigittan core loop stabilizes around minute 18.
Mistake 1 — Triggering Tidal Hustle Below 70% Fever
The most common error is casting Tidal Hustle the moment the Super Fever gauge shows any value. The skill's burst modifier only activates at 70%, and a sub-70% cast still consumes the cooldown without producing the chain. The fix is patience. Spend Phase 1 and Phase 2 landing clean Hustle Tap inputs and let the gauge climb on its own.
Mistake 2 — Skipping the Nyandola Shell
A harigittan build without Nyandola burns the backline during the enrage phase. The defensive shell from Stalwart March is the difference between a clean Phase 4 and a panicked reset. Players who want a faster pace should swap Nyandola for a second Harigittan, but only for short boss fights where Phase 4 lasts under 15 seconds.
Mistake 3 — Over-investing in Stalwart March
A nyandola build that dumps 4 points into Stalwart March feels tanky but contributes almost nothing to the Fever engine. The buff triggers on any single point, so the second through fourth points are wasted. Pull those points into Shield Crescendo instead, and the Fever uptime climbs noticeably during the second half of the fight.
Mistake 4 — Running Mimizukyun in Single-Target Fights
Mimizukyun's March Cadence accelerates adds, and adds do not exist in every fight. Against a single-target boss, swap Mimizukyun for a second Nyandola or a Keroronpa tempo anchor. The Cobun rotation speeds up anyway because there are no adds to manage.
Frequently Asked Questions
What is the best skill path for a harigittan build in Ratatan?
The standard path invests 4 points into Tidal Hustle, 3 into Hustle Tap, 2 into Fever Echo, and 1 into Crowd Crescendo. That split maximizes the burst window while keeping the Fever engine spinning, and it scales cleanly into the late-game boss phases. Players who want a more forgiving rhythm should swap one Hustle Tap point into a rhythm tolerance Decorune instead.
Why does the harigittan build need a nyandola guide partner?
Nyandola converts blocked hits into Fever Build, and that conversion extends the average Fever uptime by roughly 22% compared to a Harigittan solo carry. The defensive shell from Stalwart March also keeps the squishy backline alive during the enrage phase. A nyandola build that leans into Shield Crescendo and Deflective Beat is the natural pairing for Harigittan's burst window.
When should I swap Mimizukyun out of the squad?
Mimizukyun earns her slot only when the boss fight includes adds that benefit from accelerated Cobun rotations. For single-target fights or short Episode 1 bosses, swap Mimizukyun for a second Nyandola or a Keroronpa tempo anchor. The mimizukyun guide approach is valuable, but it is not a universal pick.
What Decorune stats matter most for a harigittan build?
The priority order is Casting Distance to the 165 soft cap, then Fever Build Rate to the +28% soft cap, then Rhythm Window Tolerance to the +12% soft cap. Attack power stacks after those three caps, and defense is provided by Nyandola's Stalwart March. The Far Water and Brute Enrage Timer Decorune are the two S-tier picks for this build.
How do I read a nyandola build for Harigittan support?
A nyandola build built around Harigittan prioritizes Shield Crescendo, Deflective Beat, and a single point in Stalwart March. The nyandola guide principle is that defense converts into Fever, and the pair works because Harigittan's burst window needs the tempo stability Nyandola provides. Avoid over-investing in Stalwart March because the buff triggers on a single point.