
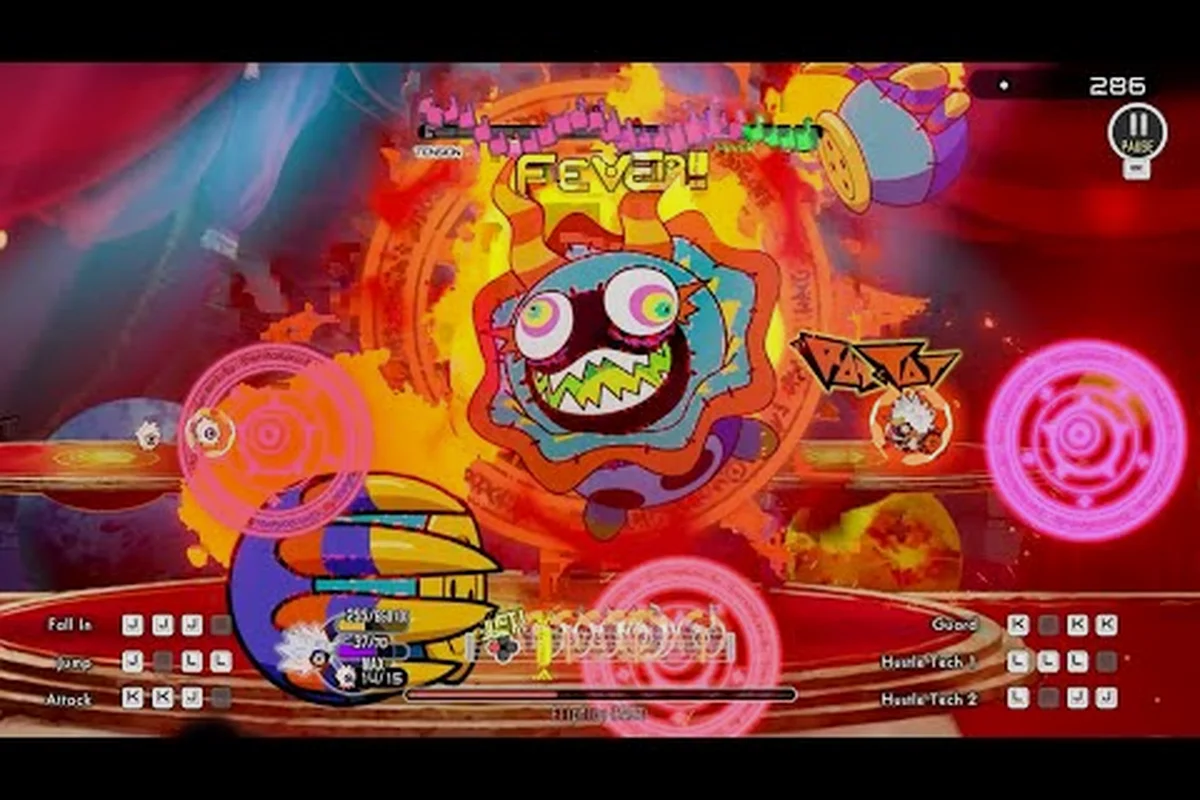
The final stretch of Ratatan is where rhythm precision and positioning collide, because each finale boss in the Episodes 3 and 4 content drop layers a fresh pattern on top of the standard four-beat command loop. Players who already cleared earlier routes often stall on the first phase transition of Shellshock, then get buried by Pandamonium's beat shuffles, only to misread the Bamboozler's decoys and lose their Cobun army in seconds. This guide breaks down the entire final-boss roster with timings, retreat windows, and rhythm command priorities that survive the version 1.0 balance pass, so a single failed run stops costing twenty minutes of march and regroup.
Understanding Ratatan's Final Boss Structure
Every finale in Ratatan shares the same skeleton: a march-and-build lead-in, two or three scripted phase events, and a closing burst that punishes anyone who broke rhythm earlier. The official Ratatan site frames the loop as commands delivered on beat while the Ratatan moves freely, which means the final bosses test two skills at once — the judgment window for each chant and the spatial decision of where the Ratatan stands when the cue lands.
The closing encounter of each route resolves inside a fixed music bed, so the beat is telegraphed far more reliably than mid-game skirmishes. What changes between bosses is the density of incoming patterns and how aggressively the arena shrinks around you. Community testing on the Ratatan Steam news feed suggests that the version 1.0 retune tightened the judgment window by roughly one frame on hard boss mode, which is why guides written before Episodes 3 and 4 often recommend timings that now miss.
Phase Anatomy Every Finale Shares
Each finale has three distinct rings, and missing the transition cue is the single most common cause of a wipe. The opening ring is the safest because the boss telegraphs every attack two beats ahead, and the player's Cobun can absorb a single hit without collapsing the formation. The mid ring is where the music bed shifts — a half-measure drop, a tempo lift, or a syncopated snare — and the player who keeps chanting the old pattern will drop their combo and start taking chip damage.
The closing ring removes all telegraphing. Damage windows shrink from two beats to one, the arena contracts by roughly a third, and retreat options collapse to a single safe tile behind the boss's swing arc. Reading the closing ring correctly is the entire game inside the game, and the rest of this guide exists to teach that read for each specific encounter.
Why Rhythm Hits Harder Than HP
Ratatan does not scale finale difficulty with raw hit points. Instead, every missed command in the closing ring stacks a Rhythm Break debuff that amplifies incoming damage by about 12% per missed beat for the rest of the fight. Two missed beats in a row is survivable; three is a soft enrage, and four typically kills a full-health Cobun army before the next cue resolves. This is why the right answer to a hard pattern is sometimes to retreat the Ratatan and reset the command queue rather than push through a risky chant.
| Ring | Telegraph | Retreat Option | Rhythm Break Risk |
|---|---|---|---|
| Opening | 2 beats ahead | Full arena | Low (0% per miss) |
| Mid | 1 beat ahead | Half arena | Medium (6% per miss) |
| Closing | None | 1 tile | High (12% per miss) |
Ratatan Shellshock Boss Strategy
Shellshock is the first finale most players face after clearing the Episode 3 mid-bosses, and it punishes players who treat it like a damage race. The encounter is built around a tidal rhythm where the boss raises and lowers a shockwave ring on alternating measures, and the safe window for any forward command is the single beat between the ring contracting and expanding again.
Phase One: Reading the Shockwave
During the opening ring, Shellshock sends two slow shockwaves that travel from the back of the arena to the player's tile. The shockwave's audio cue is a low brass swell on beat 3 of every other measure, and the safe tile flips to the opposite side of the arena on each cycle. Community videos on the Ratatan Steam community videos page confirm that the safest opening strategy is to hold the retreat command on the downbeat and only chant advance on beat 2 once the swell has fully decayed.
The Cobun army should be set to defend during this phase, because three or four of the smaller units will absorb a shockwave hit that would otherwise break the player's chant chain. Losing a Cobun here is cheaper than losing rhythm, and respawns are free between phases.
Phase Two: The Tempo Shift
The mid ring is where Shellshock retunes to a faster 4/4 pattern, and the shockwaves now fire on every beat instead of every other. The shift is marked by a single snare hit on what was previously beat 4 — when that snare lands, the player's internal metronome must immediately re-anchor to the new tempo, or the next two shockwaves will land before any command can resolve.
The recommended counter is to switch the Ratatan's command queue from march-defend-march to march-attack-retreat for the duration of this ring, because the new tempo rewards aggression over positioning. Players who keep the defensive queue lose their Cobun to chip damage in roughly twenty seconds, while the aggressive queue clears the shockwave in time with the music.
Phase Three: The Closing Burst
Shellshock's closing ring removes the shockwave entirely and replaces it with a single full-arena slam that hits on the first beat of every measure. There is no safe tile — only a safe timing. The slam is choreographed to land exactly on the snare hit, so the player's chant must complete before the snare resolves. The cleanest pattern is attack-attack-defend with the defend queued to land on the snare, which gives the Cobun a one-beat damage shield right when the slam fires.
| Phase | Pattern | Recommended Queue | Cobun Stance |
|---|---|---|---|
| Opening | Shockwave every 2 beats | Retreat on 1, Advance on 2 | Defend |
| Mid | Shockwave every beat | March, Attack, Retreat | Mixed |
| Closing | Arena slam on snare | Attack, Attack, Defend | Defend on snare |
Ratatan Pandamonium Boss Strategy
Pandamonium is the encounter most players describe as the true finale, because its music bed is built on a 7/8 time signature that resists the four-beat command loop the rest of the game trains. The boss cycles between three attack patterns — bamboo thrust, drum crash, and bamboozle clone — and each cycle is offset by a half-measure, which is why a player who internalizes 4/4 will feel like every cue is arriving one beat late.
Surviving the 7/8 Trap
The single most important habit for Pandamonium is to stop counting in fours and start counting in sevens. The music does not lie — the snare lands on the 1, the bamboo thrust animates on the 4, the drum crash resolves on the 7, and the next measure starts on the 1 of the next group. Players who try to force a 4/4 pattern onto a 7/8 bed will fire every command on the wrong beat and accumulate Rhythm Break stacks within ten seconds.
The recommended command cycle is march on 1, defend on 4, attack on 7, which maps every command to a musical event and gives the Cobun army a clear role for each beat. This cycle is slower than the 4/4 version, but it never misses the judgment window, which is the entire point.
Handling the Bamboozle Clone
The bamboozle clone spawns on the third measure of every cycle and mirrors the player's last command. If the player chants attack, the clone chants attack; if the player chants retreat, the clone retreats in the same direction. The counter is to deliberately queue a feint command — a single defend inserted between two attacks — which breaks the mirror and leaves the clone stuck in the wrong stance for one full cycle. Two feints in a row is overkill; one per cycle is enough to keep the mirror from stealing the player's rhythm.
| Cycle Beat | Music Event | Command | Purpose |
|---|---|---|---|
| 1 | Snare | March | Advance into position |
| 4 | Bamboo thrust | Defend | Block incoming damage |
| 7 | Drum crash | Attack | Punish the recovery |
| 10 | Clone spawn | Feint (defend) | Break the mirror |
The Drum Crash Window
The drum crash is Pandamonium's heaviest single hit, and it lands on the 7 of every measure. The recovery animation is the longest in the fight — roughly one and a half beats — which means the player has a full beat of free damage after each crash. The recommended opener is to save the Cobun's special ability for this window, because the special ignores the boss's damage reduction and clears about 18% of Pandamonium's health on a clean hit.
Two specials per cycle is the safe maximum; a third will run the Cobun out of stamina and leave the player without an emergency button for the closing ring. Players who burn all three specials in the opening ring usually run out of steam before the bamboozle clone phase ends.
Ratatan The Bamboozler Boss Strategy
The Bamboozler is the most pattern-dense finale in the Episode 4 content drop, because it stacks three independent attack layers — bamboo projectiles, snare traps, and music stutter — on top of the same 4/4 bed the opening levels trained. The boss is the spiritual successor to the mid-game Hermit encounter, and players who already cleared that route will find the Bamboozler's tells familiar, just faster and more punishing.
Reading the Three Layers
The bamboo projectiles fire on beats 2 and 4 of every measure, the snare traps arm on beat 3 and detonate on beat 1 of the next measure, and the music stutter lands randomly once per cycle. The three layers are independent, which means the player must track all three at once instead of focusing on a single pattern. Community testing suggests the cleanest mental model is to assign each layer to one Cobun role: a dedicated dodger for projectiles, a stationary defender for the snare traps, and the Ratatan itself for the stutter.
The stutter is the hardest layer to read because it does not follow the music — it lands on whichever beat the player is least expecting. The audio cue is a brief drop in the bass line, and the visual cue is a single frame where the Bamboozler's animation freezes. A player who reacts to the freeze will eat the stutter, so the right play is to anticipate the freeze and queue a retreat command one beat ahead.
The Trap Reset Loop
The snare traps are the Bamboozler's most consistent damage source, because they detonate on the downbeat and the player's natural instinct is to chant on the downbeat. The counter is to shift the entire command queue by one beat for the duration of the trap phase — march on the "and" of 1, attack on the "and" of 2, retreat on the "and" of 3, defend on the "and" of 4. The off-beat queue feels wrong at first, but it dodges every trap while keeping the rhythm combo intact.
| Layer | Timing | Counter | Cobun Role |
|---|---|---|---|
| Bamboo projectiles | Beats 2 & 4 | Sidestep on 1, hold on 3 | Dodger |
| Snare traps | Arm 3, detonate 1 | Off-beat command queue | Defender |
| Music stutter | Random 1/cycle | Pre-emptive retreat on bass drop | Ratatan |
Closing Ring: The Triple Stutter
The Bamboozler's closing ring replaces the snare traps with a triple stutter — three freezes in quick succession, each landing a heavy hit if the player is mid-chant. The triple stutter is choreographed to land on beats 1, 3, and 4 of the final measure, and the player's queue must be defend, retreat, defend with the retreat landing on beat 3 to dodge the second freeze. Missing any one of the three is recoverable; missing two is a wipe, because the Rhythm Break stacks from two freezes will one-shot the Cobun army before the music resolves.
The recommended opener for the closing ring is to dismiss the dodger Cobun entirely and pool the army into a single defender blob. Three smaller defenders in a stack absorb the triple stutter better than a spread formation, because the splash damage from each freeze is shared across the stack instead of concentrated on a single unit.
Ratatan Tangletung, Midnight Knight, and Wagoon Boss Strategy
The remaining three finales — Tangletung, the Midnight Knight, and Wagoon — are the side-route encounters that unlock after clearing the Shellshock and Pandamonium routes. Each one rewards a different rhythm habit, and players who try to use the same queue across all three will fail the first phase of at least two. The cleanest way to read the trio is to treat them as specialist drills: Tangletung trains timing precision, the Midnight Knight trains spatial awareness, and Wagoon trains stamina management. The cleanest way to read the trio is to treat them as specialist drills: Tangletung trains timing precision, the Midnight Knight trains spatial awareness, and Wagoon trains stamina management, and if you want to reinforce that rhythm-tracking focus with the right soundtrack in your ears, our Ratatan boss music roundup pairs every encounter with a track worth queuing up between attempts.
Tangletung: The Timing Drill
Tangletung is a vine-wrapped totem that fires homing spores on the off-beats and pulls the Ratatan toward the center of the arena on the downbeats. The encounter is built around a 4/4 bed, but the spore timing is offset by an eighth note, so a player chanting on the beat will eat every spore. The counter is to chant on the off-beats — march on the "and" of 1, defend on the "and" of 2, and so on — which lines the commands up with the spores' recovery animation and dodges every hit.
The Tangletung fight is short — about two minutes from cue to closing ring — but it is the single best place in the game to train off-beat timing, because the music is steady and the pattern never deviates. Players who can clear Tangletung without a single Rhythm Break stack have the timing foundation to clear every other finale in the roster.
The Midnight Knight: The Spatial Drill
The Midnight Knight is a slow, heavily armored boss that teleports between four fixed tiles around the arena and swings a massive halberd on every other beat. The encounter has no rhythm gimmick; the music is a steady 4/4 march, and the only variable is where the Knight teleports next. The Knight's teleport is telegraphed by a single bell toll, and the destination tile glows for half a beat before the Knight arrives.
The recommended counter is to mirror the Knight's tile — always stand on the tile diagonally opposite the Knight's current position, so the halberd swing passes behind the Ratatan instead of in front. The mirror strategy keeps the player out of every swing arc and lets the Cobun army focus on damage without dodging. Losing the mirror is recoverable, but only if the player resets on the next bell toll; missing two tolls in a row puts the Ratatan inside the halberd arc and starts the Rhythm Break cascade.
Wagoon: The Stamina Drill
Wagoon is the longest finale in the game — roughly four minutes from cue to closing ring — and it is built around a stamina-drain mechanic where every command the player chants costs a small amount of the Ratatan's stamina bar. The boss itself is not especially dangerous; the real enemy is the clock, because running out of stamina in the closing ring locks the player out of every command and turns the rest of the fight into a passive march toward death.
The counter is to rotate commands every measure instead of chaining the same command twice in a row. The rotation — march, attack, defend, retreat — spreads the stamina cost across all four command types and keeps the bar near full for the entire fight. Chaining two marches or two attacks in a row doubles the per-command stamina cost and bleeds the bar dry in roughly ninety seconds.
| Boss | Drill Focus | Key Habit | Closing Ring Cue |
|---|---|---|---|
| Tangletung | Off-beat timing | Chant on the "and" | Triple spore volley |
| Midnight Knight | Spatial awareness | Mirror the Knight's tile | Halberd slam on 1 |
| Wagoon | Stamina management | Rotate every command | Lockout at zero stamina |
Frequently Asked Questions
What is the cleanest way to learn the Ratatan Shellshock boss phase shift?
Listen for the single snare hit on what was previously beat 4. That snare is the marker for Shellshock's tempo change, and re-anchoring your internal metronome to the new beat within one second is the difference between clearing the mid ring and losing your Cobun to chip damage. Practicing the shift on the opening ring is a waste of time because the tempo only changes inside the mid ring itself.
How do I break the Pandamonium bamboozle clone mirror?
Insert a single defend command between two attacks in your cycle. The clone mirrors your last command, so a deliberate defend breaks the mirror and leaves the clone stuck in the wrong stance for one full cycle. One feint per cycle is enough; two is overkill and burns stamina you need for the closing ring.
Is the Ratatan the Bamboozler boss harder than Pandamonium on hard mode?
Reported by players, yes — the Bamboozler's triple stutter in the closing ring stacks Rhythm Break faster than Pandamonium's drum crash, and the off-beat queue required for the snare traps is harder to maintain under pressure. Clear Pandamonium first to build the 7/8 timing habit, then attempt the Bamboozler on hard mode once that habit is automatic.
Can I clear the Tangletung boss without taking any spore damage?
Yes, but only by chanting on the off-beats for the entire fight. The on-beat queue will eat every spore, and the off-beat queue dodges every spore. The transition feels unnatural for the first thirty seconds, but the music is steady enough that the off-beat pattern locks in quickly.
What is the most common wipe cause in the Wagoon boss fight?
Running out of stamina in the closing ring. Players who chain two of the same command in a row double the per-command stamina cost, and the bar empties before the closing ring starts. Rotate march, attack, defend, retreat every measure to keep the bar near full and preserve the emergency retreat for the lockout phase.