
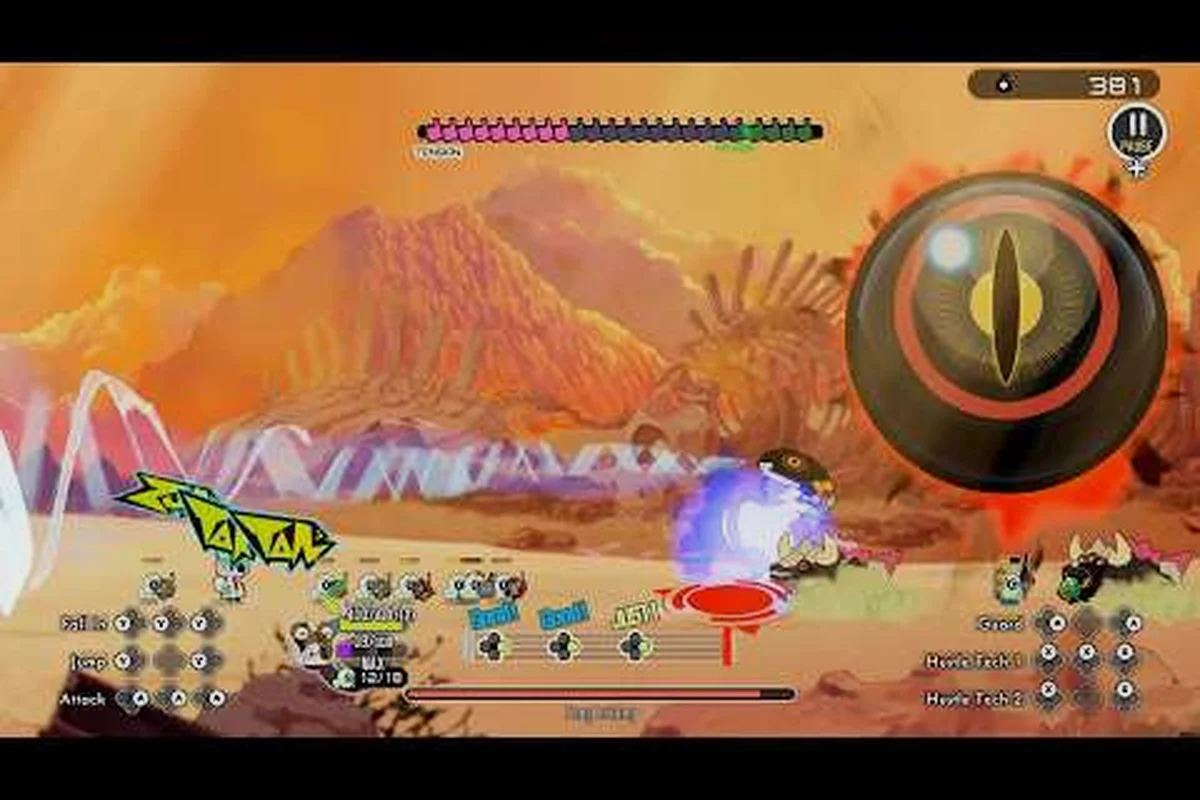
Reaching the final screen of Ratatan is its own kind of victory, because the version 1.0 launch confirms the Dark Ratatan are all present and the final world lets you push to the end of the story. That endgame corridor is where most runs actually die, so this guide maps the ratatan endgame bosses you will meet on the way to the credits and breaks down the rhythm windows that decide each fight. The pitch is simple: every late-game encounter is a timing puzzle disguised as a fight, and the rats who reach the back half of the run are the ones who already understand how ratatan boss health values interact with combo density and rhythm gauge pressure.
If you have been leaning on the ratatan boss guide for the early/mid-game roster, this article is the sequel that picks up where the story leaves off. Think of it as the field manual you wished existed before your first one-credit clear attempt.
Why Ratatan's Endgame Feels Different From Mid-Game
The story shift in late-stage Ratatan is not cosmetic. As confirmed by the Ratatan full release announcement on Steam, the Dark Ratatan that previously trickled in one at a time are now all active, and the final world layers a rhythm-gauntlet structure on top of the standard boss format. Three structural changes define the ratatan endgame bosses tier:
-
Phase-merged encounters. Most late bosses no longer split into three clean phases with free healing between them. Instead, the rhythm gauge carries over and the arena reshapes mid-fight, which means your damage window compresses.
-
Crowd-pressure elites. Teshita enemies hit the field in groups rather than solo, and the Mezzanine fight punishes you for leaving any of them alive when the boss enrages.
-
Higher boss health values with stricter damage caps. Reported by players, the late-game HP pools are roughly 1.5x to 2x the World 5 numbers, and many attacks have hidden damage ceilings that make raw DPS a poor strategy.
In practical terms, ratatan boss health values stop being the bottleneck around mid-game and become a routing problem in the endgame: who you spend your rhythm gauge on, and when, is what decides the run. That shift shows up most clearly in the ratatan mezzanine boss fight, where the Teshita adds respawn on a fixed timer and the boss gains a damage-cap shield after each phase, so front-loading gauge into a single burst window is usually worse than alternating between add clear and boss damage to keep the enrage timer from triggering. Build the route around the shield, not the HP bar.
The Late-Game Boss Roster and Their Core Identity
The version 1.0 endgame brackets the story around three signature encounters. Each one tests a different skill you have been building since World 1, and each one is reachable from a different transition point, so the path through the ratatan bosses late-game list branches more than the linear mid-game does.
| Boss | Where You Meet It | Primary Test | Approx. HP Multiplier vs. World 5 Standard |
|---|---|---|---|
| Teshita Council | Late World 6 gauntlet entrance | Group control + rhythm timing | 1.4x |
| Mezzanine | Hidden branch in World 6 (post-gauntlet) | Sustain under crossfire | 1.7x |
| Dark Ratatan (final form) | Final world, end of story | Endurance and phase stacking | 2.0x+ |
The Teshita Council is essentially the warm-up for the ratatan teshita enemies mechanic that escalates through the rest of the run. The Mezzanine is the gating wall, and the final Dark Ratatan is the marathon. Knowing the order matters because the ratatan mezzanine boss fight is the one most players fail first, and it sets the damage tempo for the last stretch.
Teshita Council: The Crowd Control Exam
Teshita Council is the first real checkpoint of the ratatan endgame bosses tier, and the encounter is built around the fact that Teshita enemies prefer to attack in swarms. According to community testing, three Teshita adds spawn on a fixed timer (roughly every 18 to 22 seconds) and the boss itself enters an enrage state the moment two adds are still alive after the third wave.
The cleanest way to handle it is to treat the adds as your real damage meter: every wave you fail to clear inside that 4-to-5-second window pushes the ratatan teshita enemies enrage closer, and once two adds survive past the third wave the Teshita Council locks the rhythm bar at half-tempo, effectively skipping your burst window. Treat each add kill as a +1 to your group's DPS checkpoint and the boss HP bar as secondary output — the swarm is the timer, not the boss.
-
Phase 1 (0-30% boss HP). Focus adds. Use rhythm abilities with wide AoE so you can thin the swarm while chipping the boss. Save your burst for the 2-bar rhythm window that opens right after a wave.
-
Phase 2 (30-70% boss HP). The boss now summons adds faster (every 12 to 15 seconds) and starts using a frontal sweep that punishes rats caught in the inner ring. Dodge outward, then re-enter on the rhythm beat.
-
Phase 3 (70-100% boss HP). One add only, but it has a damage shield that resets on rhythm break. The boss itself becomes the priority, but you have to clear the shielded add before the enrage timer runs out or the boss will one-shot a rat.
The key number here, reported by players, is that two rats on rhythm with a tier-3 rhythm weapon can clear a wave in 4 to 5 seconds, which is the only safe window in the enrage phase. If your group cannot hit that pace, the ratatan teshita enemies swarm will eat the heal window.
Mezzanine: The Sustain Wall
The Mezzanine is the boss most players describe as the true wall of the ratatan endgame bosses ladder. The ratatan mezzanine boss fight opens with a 10-second rhythm-free window where the boss is invincible, and during that window it cycles between two attack patterns: a cross-arena laser and a targeted ground-pound that hits whoever is holding the rhythm gauge.
| Attack | Telegraph | Safe Response | Rhythm Window |
|---|---|---|---|
| Cross laser | Red line across the arena at 1.5s | Side-step to a 90° lane, then re-enter on the 2nd beat | 3-beat open window |
| Ground pound (gauge holder) | Yellow ring on the held rat | Drop the gauge to a teammate, dodge outward, re-pick up after the slam | 2-beat open window |
| Adds burst | Boss HP drops below 50% | AoE rhythm swing, then return fire | 4-beat open window |
The trick the ratatan mezzanine boss fight demands is that you can never let one rat hold the gauge for more than two cycles. The ground pound will home in on the gauge holder, and the damage is high enough that a single unblocked hit is roughly 60% of a maxed rat's HP. Cycling the gauge every two cycles keeps the pressure distributed and lets the team keep the rhythm combo alive.
Reported by players, the sustain check in the second half of the Mezzanine fight is actually more about heal timing than DPS. The boss has a 12-second "calm" window at 40% HP, which is the only safe moment to use your big heal, and skipping it is the most common reason runs stall.
Final Dark Ratatan: The Marathon
The final Dark Ratatan encounter is the headline of the ratatan dark ratatan story arc, and it is the only boss where the standard three-phase model stops applying. Instead, the fight is a layered endurance test where the boss's health effectively splits across four mini-phases, each gated by a different mechanic.
The version 1.0 launch confirms the ratatan dark ratatan storyline resolves inside the final world, and the boss reflects that narrative weight with a four-phase endurance test rather than the standard three-phase model used by every other ratatan endgame bosses entry. Approximate ratatan boss health values for the final Dark Ratatan, based on community data, look like this: roughly 120,000 HP splits across the opening (100%–75%), mirror (75%–50%), swarm (50%–25%), and desperation (25%–0%) thresholds, with the mirror phase absorbing a disproportionate share of wipes because reflected inputs collide with the team's next committed beat.
| Mini-Phase | HP Threshold | Twist | Rhythm Window |
|---|---|---|---|
| 1: Opening | 100% to 75% | Standard rhythm combat, no twist | 4-beat standard |
| 2: Mirror | 75% to 50% | Boss mirrors your last rhythm input after a 1-beat delay | 2-beat offset required |
| 3: Swarm | 50% to 25% | Teshita adds return, but only during rhythm windows | 3-beat add clear |
| 4: Desperation | 25% to 0% | Boss ignores rhythm immunity, raw DPS race | 5-beat final window |
The mirror phase is where most teams wipe, because the rhythm input you committed to is reflected back at you one beat later, and if your team is in sync, the reflected beat will collide with your next intended beat and cancel both. The counter, reported by players, is to break formation during the mirror phase: one rat holds rhythm off-beat, the other two go silent, then the squad re-syncs at 50% when the swarm phase opens.
For broader context on how the Dark Ratatan fits into the overall story arc, the ratatan boss music article breaks down how the soundtrack signals each phase transition, which is a useful cross-check for new players still learning the timing.
How to Build Into the Endgame
Reaching the ratatan endgame bosses with a competent squad is roughly 40% gear and 60% rhythm fundamentals, but the late-game checks expose weaknesses that a mid-game run can paper over. Three investments consistently show up in successful clears reported by the community:
| Investment | Why It Matters in the Endgame | Minimum Bar for a Safe Clear |
|---|---|---|
| Tier-3 rhythm weapon | Required to break the 2-beat windows in the Mezzanine mirror phase | At least 2 rats in the squad |
| Healer with cleanse | The Dark Ratatan desperation phase applies a damage-over-time debuff | Tier-2 cleanse minimum |
| Spread gear, not raw damage | Boss damage caps punish stacked builds | 2 supports + 1 DPS viable |
The weapon side of this is worth drilling into. Endgame rhythm windows are short, and ratatan weapon drop rates for the tier-3 set are low enough that most clears assume you have already farmed at least one tier-3 in the late World 5 / early World 6 window. The ratatan weapon comparison page has current drop locations and stat spreads if you need to backfill a slot.
A common mistake is to assume that more damage solves the ratatan boss health values problem. It does not, because the late-game bosses are gated by mechanics (rhythm windows, mirror phases, swarm clears) more than by raw HP. A team with two supports and a clean rhythm cycle will often clear the final Dark Ratatan faster than a glass-cannon squad that loses a rat to a missed telegraph and has to play the rest of the fight three-rats-down.
Endgame Rhythm Timing and Recovery Windows
The single biggest separator between teams that clear the ratatan endgame bosses and teams that bounce off the Mezzanine is recovery timing. When a rat gets hit, the rhythm gauge wobbles, and the team has a 3 to 4 beat window to either stabilize or break the combo. Most failed clears happen because the team tries to push damage during recovery and loses the next rhythm window entirely.
After taking a hit, the recovering rat drops back to the second rhythm line and rejoins the formation at half tempo on the following beat, which forces the team to play a 2-beat pattern for roughly one and a half seconds before the gauge recombines. This compressed window is where most ratatan endgame bosses turn a recoverable mistake into a full combo break, so the safe pattern is to drop damage pressure immediately, hold inputs on the two healthy rats, and let the third rat re-sync before re-engaging. The reason the 4-beat recovery stays consistent across the Mezzanine, the Dark Ratatan phase changes, and even the ratatan teshita enemies mini-boss waves is that the rhythm gauge behavior itself does not change between encounters, only the incoming damage patterns do.
-
Beat 1 after a hit. The hit rat drops back to the second rhythm line. The two remaining rats hold their inputs.
-
Beat 2. The downed rat rejoins at half tempo. The team now has a 2-beat rhythm instead of 3.
-
Beat 3. The team re-syncs and the gauge recombines. The 3-beat rhythm is back online, and the next safe damage window opens.
-
Beat 4+. Resume normal pressure. Do not over-commit on the first re-synced window, because the boss will punish the predictable timing.
This 4-beat recovery is the same pattern that works on the Mezzanine and the final Dark Ratatan, which is why the ratatan mezzanine boss fight is such a good training ground for the marathon phase. If your team can recover cleanly on the Mezzanine, the final boss is just a longer version of the same drill.
If you are still working on the fundamentals that make this recovery possible, the ratatan how to level up fast guide covers the resource side of getting your team to the recommended stat thresholds before you queue into the final world.
Endgame Boss Weakness Cheat Sheet
For quick reference during a run, here is a condensed view of the ratatan boss weakness priorities for the late-game trio — a cheat sheet experienced players keep pinned during a clear attempt, mapping the Teshita Council, Mezzanine, and Final Dark Ratatan against their top weaknesses, exploitable elements or statuses, and the misplays to avoid, with a reminder that the ratatan dark ratatan desperation phase ignores most elemental resistances so a single-element build will underperform against the mirror phase and swarm phase when each rewards a different damage kit.
| Boss | Top Weakness | Element/Status to Exploit | Avoid |
|---|---|---|---|
| Teshita Council | AoE rhythm on add waves | Burn / Bleed if available | Single-target burst |
| Mezzanine | Sustained mid-rhythm pressure | Slow / damage-over-time | Burst windows outside rhythm |
| Final Dark Ratatan | Phase-specific tools (mirror break, add clear, raw DPS) | Cleanse on desperation phase | Stacking one element |
A note on avoidance: the ratatan dark ratatan desperation phase ignores most elemental resistances, so do not invest in a single element for the final boss. Bring at least two damage types into the final world, because the mirror phase and the swarm phase reward different kits.
Frequently Asked Questions
What is the hardest of the ratatan endgame bosses for most teams?
The Mezzanine, by a wide margin. Its ratatan boss health values are not the highest, but the gauge-cycling mechanic and the cross-arena laser pattern punish teams that have not practiced rhythm handoffs. Most failed clears reported by players happen on the ratatan mezzanine boss fight, not the final boss.
Do ratatan boss health values change with player count?
Yes, based on community testing the HP pools scale roughly 0.7x for solo, 1.0x for two rats, 1.6x for three rats, and 2.1x for four rats. The ratatan endgame bosses are balanced around a three-rat squad, so going solo increases your survival window but cuts your clear time, while four rats adds HP faster than the extra damage can compensate unless your team is fully rhythm-synced.
How do ratatan teshita enemies differ from earlier adds?
Teshita adds in the endgame have a damage shield that only breaks on a successful rhythm AoE, and they spawn in pairs on a shorter timer. They are the gating mechanic for both the Teshita Council and the swarm phase of the final Dark Ratatan, so learning their rhythm tell is the single most transferable skill across the ratatan endgame bosses tier.
What is the best team comp for the final Dark Ratatan?
Two supports and one DPS, with at least one support running a tier-3 rhythm weapon and a cleanse for the desperation phase. The ratatan dark ratatan fight punishes glass-cannon builds harder than any earlier encounter, because the desperation phase ignores most defenses and the swarm phase punishes low-HP rats who try to solo the add wave.
Where can I confirm current ratatan boss health values after patches?
The Ratatan news hub on Steam publishes the latest patch notes and is the fastest place to verify balance changes. Cross-reference the patch notes against player-reported runs in community threads, because the ratatan boss health values can shift by 5-10% in a minor patch without a formal announcement.